How routing works
Managing call routing for phone numbers in Siptalk is done by creating routing profiles and attaching them to active schedules. This flexible system allows you to handle calls differently based on time of day, day of week, or any other criteria.
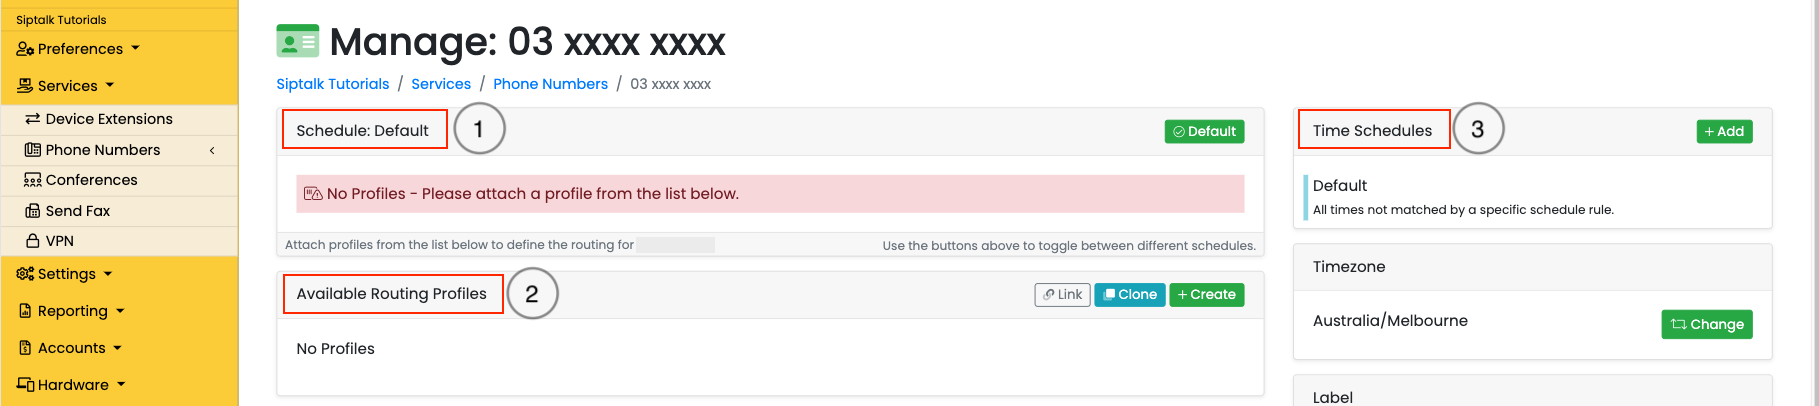
The three main panels
When you open the routing configuration for a phone number, you'll see three main panels:
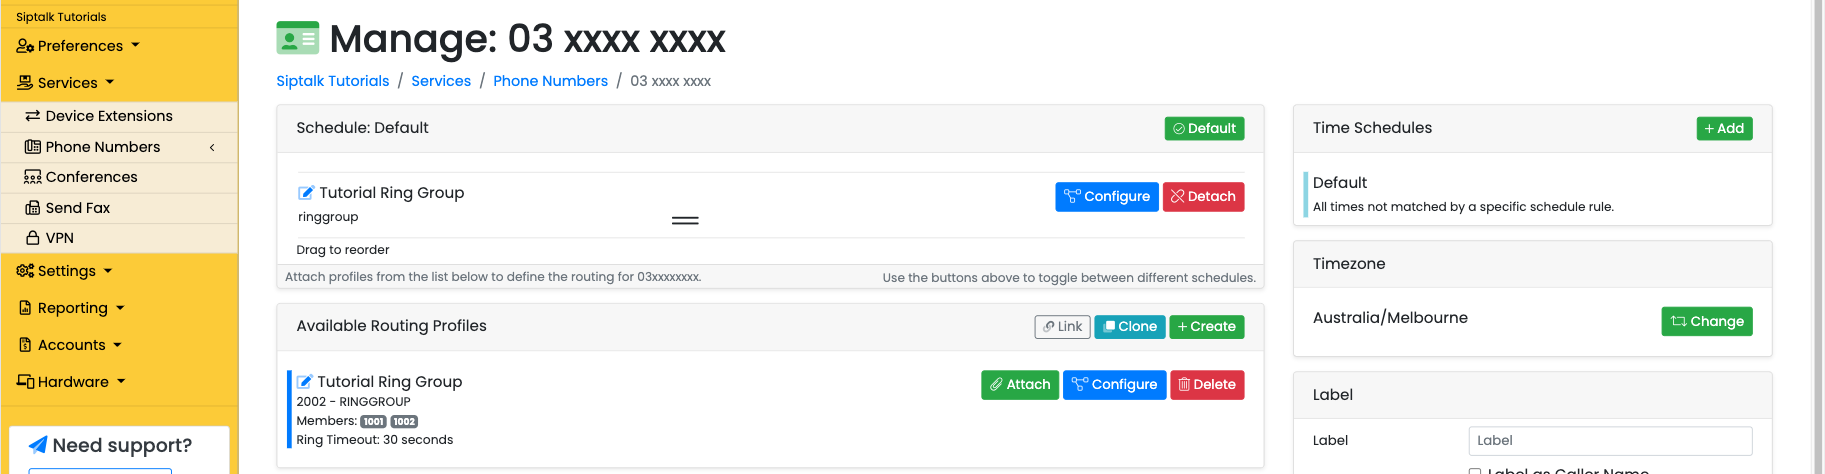
- Active Schedule — Where your routing profiles are attached. The Default schedule handles calls that don't match any other time-based schedules.
- Available Profiles — Your library of routing profiles. Create different profiles here and attach them to schedules as needed.
- Time Schedules — Create different schedules for business hours, holidays, etc. Each can have different routing profiles.
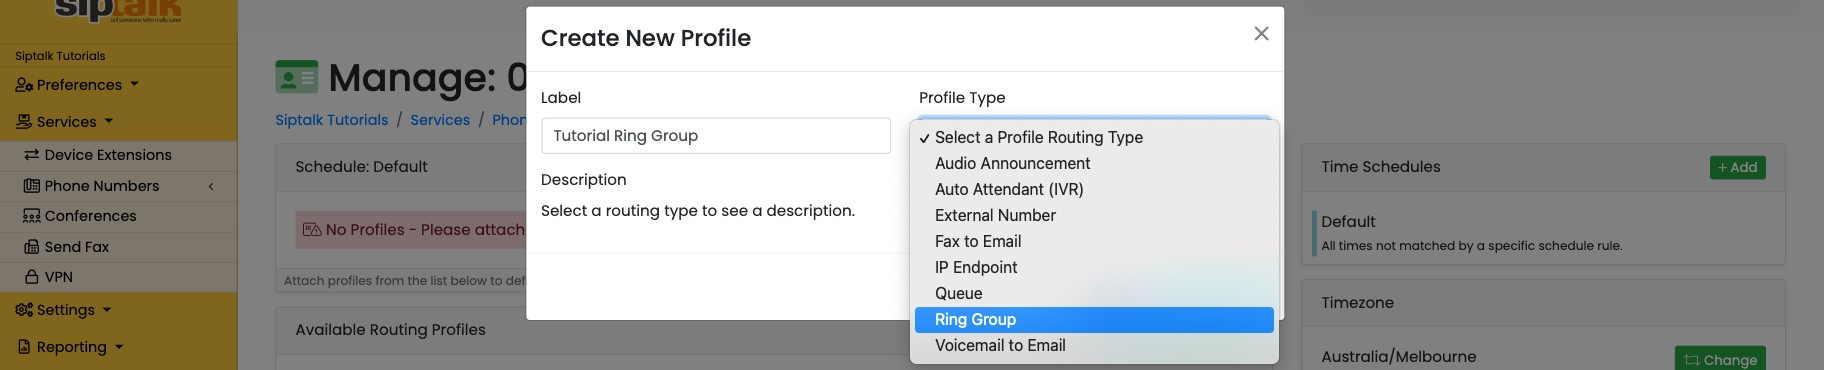
Common profile types include:
- Ring Group — Ring multiple extensions simultaneously or in sequence
- Voicemail — Send calls to a voicemail box
- IVR/Auto-Attendant — Play a menu with options
- Forward — Forward to an external number
- Queue — ACD queue distribution for call centres
Creating a profile
To create a new routing profile, click the [+ Create] button in the top right of the Available Routing Profiles panel.

Select the type of profile you want to create and give it a descriptive name. For example, if you're creating a ring group for your sales team, you might name it "Sales Ring Group".
Configuring the profile
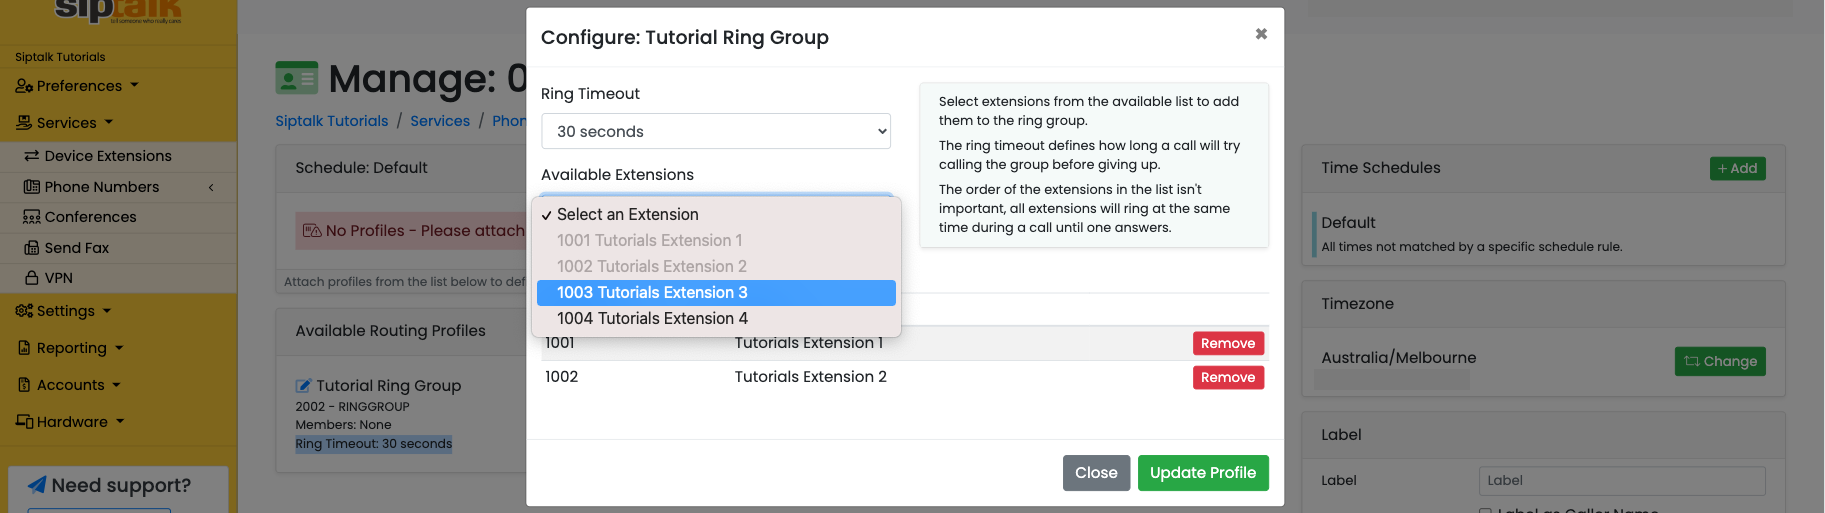
After creating the profile, you'll see it listed in the Available Profiles panel. Click [Configure] to set it up.
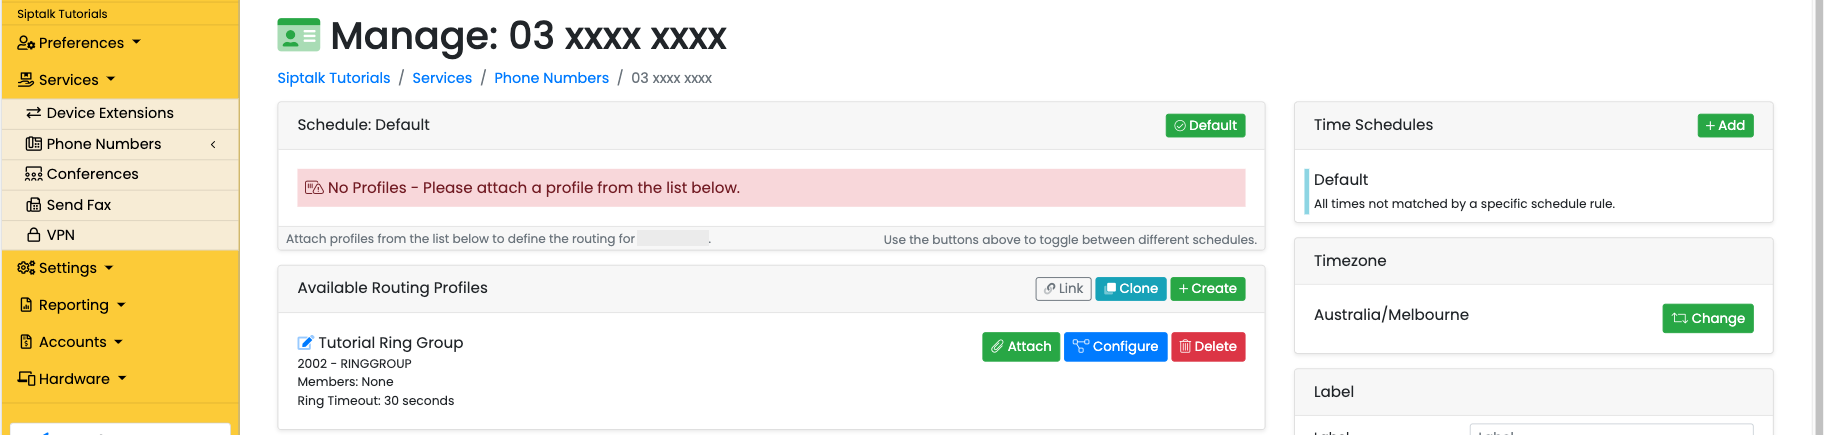
For a ring group, this means selecting which extensions should ring when a call comes in. Choose the device extensions you want to add, then click Update.
Attaching to a schedule
Once your profile is configured, you need to attach it to a schedule to make it active. Click the [Attach] button on the profile to add it to the currently selected schedule.

The Default schedule is always active and handles calls that don't match any other time-based schedules. This is your fallback routing that ensures calls are always answered.
After attaching, you'll see the profile listed in the Active Schedule panel. Calls into this number will now route through your profile.
Multiple profiles
You can attach multiple profiles to the same schedule. When a call comes in, it flows through the profiles from top to bottom. This allows you to create overflow scenarios.
For example, a common setup is:
- Ring Group (try to reach staff for 30 seconds)
- Voicemail (if no one answers, take a message)
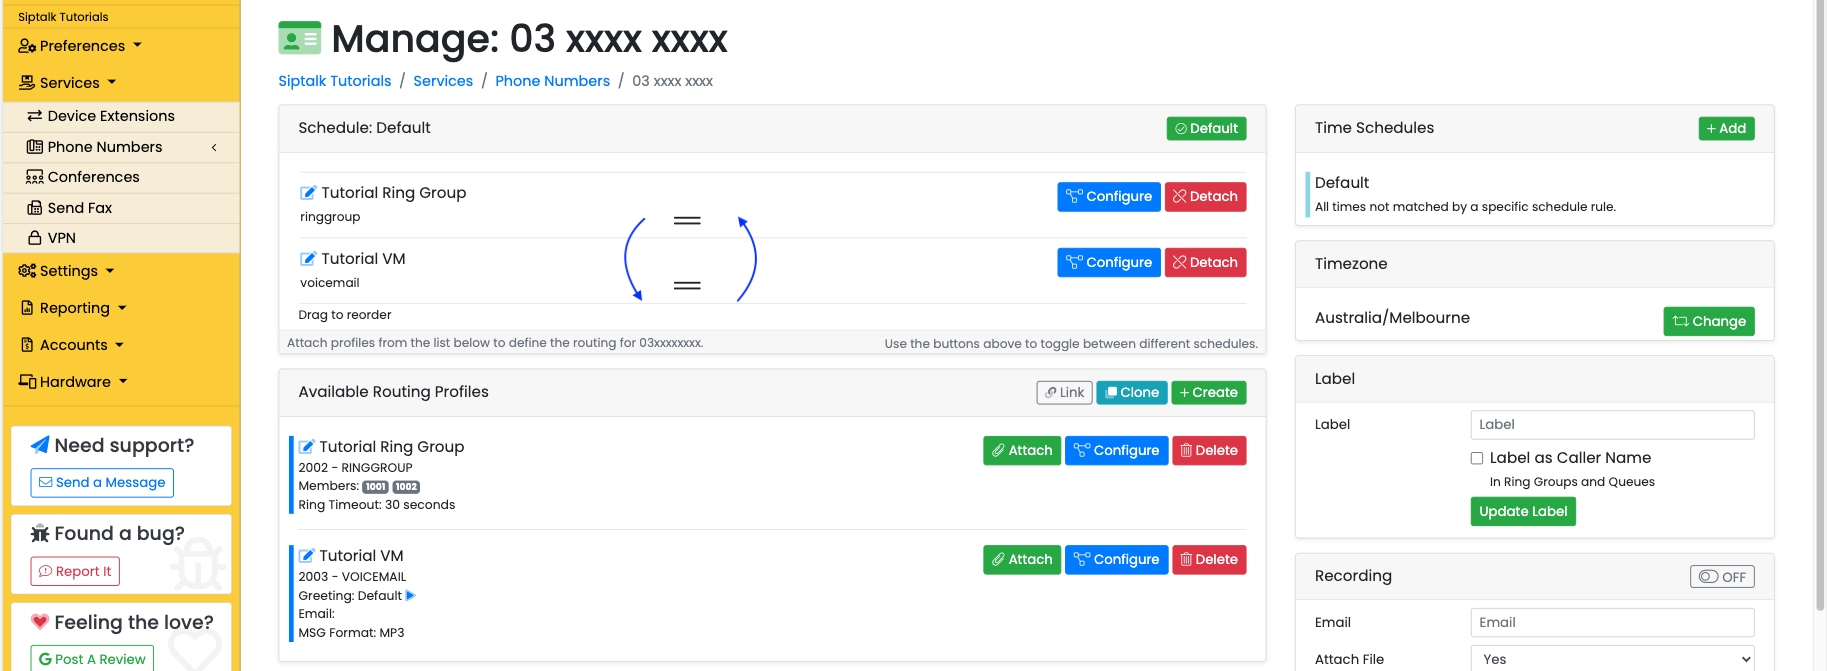
You can drag and drop profiles to change their order. The profile at the top will be tried first, then the second, and so on until the call is handled.