An Audio Announcement profile plays a recorded message to the caller, then lets the call carry on to the next profile in the schedule. Use it for a welcome ("Thanks for calling Acme Plumbing, calls are recorded for training"), a notice ("our office is closed on Friday for the public holiday"), or on its own as a closure message. This guide adds a welcome message in front of Acme's ring group.
What an announcement does
- It plays, then moves on. When the message finishes, the call continues to whatever is attached after it on the schedule — a ring group, an IVR, voicemail. If nothing is after it, the call ends.
- Callers can't skip it. Keep it short: a few seconds is plenty in front of a ring group.
- It's not live until it's attached. Like every profile, an announcement only plays once it's in the number's routing for a schedule.
Prepare the message
The announcement plays a sound file, so make that first. Either record it yourself and upload it under Settings → Sound Files (choose Announcement or Any as the profile type), or generate it with text-to-speech under Settings → TTS Voices and copy it to Sound Files — Set Up an IVR Auto Attendant shows the TTS steps. You can also upload a file later from inside the profile's configure dialog with the + button.
Create the profile
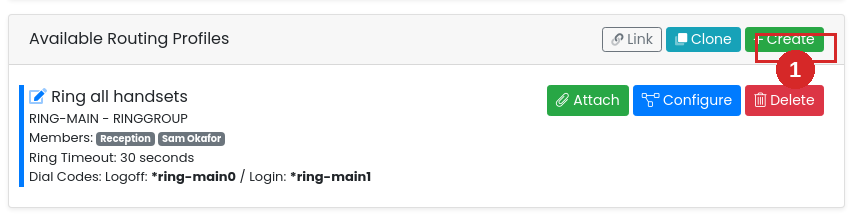
Go to Services → Phone Numbers, click [Manage] on the number, and in Available Routing Profiles click [+ Create].
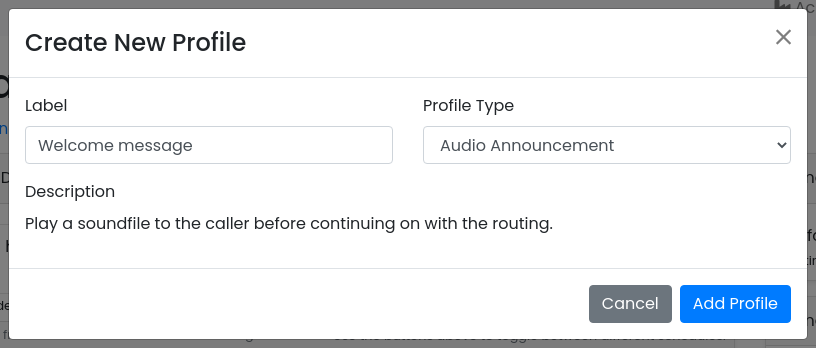
Give it a label you'll recognise in the routing list, set Profile Type to Audio Announcement, and click [Add Profile].
The new profile appears in the list without a sound file. Click [Configure] on it.

Choose the sound file
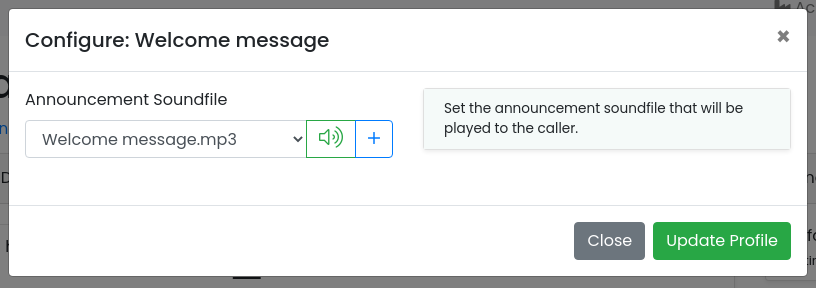
Pick the message in Announcement Soundfile. The speaker button plays it so you can check it's the right one. Click [Update Profile].
The profile row now shows the sound file.

Attach it to a schedule
Select the schedule at the top of the page and click [Attach] on the announcement. It joins the end of the schedule's list; drag it above the profile it should play before. Calls work through the list top to bottom, so for a welcome message it goes first.
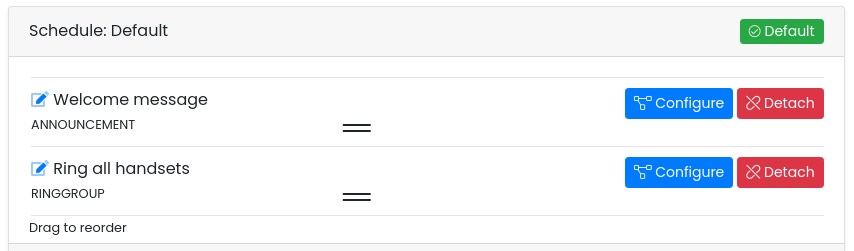
Ring the number to hear it. Each profile also has a dial code shown under its label that you can dial from an extension to test it before it goes live.
Troubleshooting
The sound file isn't in the list
Sound files are offered only if their profile type is Announcement or Any. Check the file's type under Settings → Sound Files, or upload it again with the right type. A text-to-speech file must be copied to Sound Files before it appears.
Callers hear the message and then get cut off
Nothing is attached after the announcement on that schedule. Attach the ring group, IVR or voicemail that should follow, below the announcement.
The message doesn't play at all
- Check it's attached to the schedule that's active now, and sits above the profile it should play before.
- Check a sound file is selected — a profile with No Soundfile plays nothing.